Monday, December 12, 2011
12-12-11: Visit by the kayak club
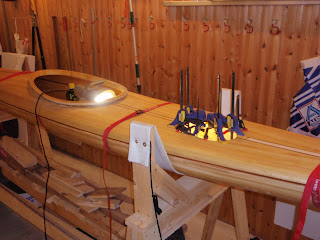
I held an open house and the local kayak club was invited. I had lined up with my pc and projector, tools, books and paper and of coarse my kayak as is. I was very excited about how many people would show up. To my pleasent surprise there came 15 - 20. I forgot to count how many we were. It was so much fun to have the opportunity to talk with others about the build.
Friday, December 9, 2011
09-12-11: Extra coat of epoxy on the deck.
The deck just got an extra coat of epoxy.
The two hatch covers was coated as well.
I was experimenting with a solution for the deck cords. I think this will work fine.
The two hatch covers was coated as well.
Sunday, December 4, 2011
03-12-2011: Hatch flanges continued.
The hatch flanges are now done. When the hatches are in place they are flush with the deck surface. I really like the look of it.
I have placed pieces of the rubber gasket to hold the hatch in the correct hight.
To hold the hatches I plan to use the moby hatch lock.
Something like this one: http://www.kayakforum.com/cgi-bin/Building/index.cgi/md/read/id/170635/sbj/other-hatch-hold-down-system-pic/
or this: http://www.westcoastpaddler.com/community/viewtopic.php?f=7&t=3517&start=100
or this: http://www.byg-kajak.dk/moby.htm
I have been thinking....
To make the grip of the moby's stronger I could:
1) Use a more powerfull bungee cord.
2) Increase the diameter of the "moby head", i.e. increase the momentum arm 1.
3) Decrease the arm length, i.e. decrease momentum arm 2.
I think I will have to make some kind of mashup to test before deciding on the final dimensions.
Saturday, December 3, 2011
29-11-2011: Bow hatch flange.
Just glued the bow hatch flange in place and made the small cutouts for my fingertips for lifting the hatches up.
The stern hatch flange is already glued in place, but I can stil grind the space for my fingertips.
The stern hatch flange is already glued in place, but I can stil grind the space for my fingertips.
Sunday, November 20, 2011
20-11-11: Bow Hatch.
Today I glued spacer in place for the bow hatch.
Its takes a looong time to build a kayak when you only build for 1-2 hours every other weekend. BUT never mind - the kayak is going to be ready for the water in springtime (the water is too cold now anyway).
Ready to mix the epoxy.
Applying epoxy to the spacer.
The spacer held in place with all the clamps I could fit into the hole.
I thinned the remaining epoxy with a bit of alcohol and sealed the edges of the hatch lid with epoxy.
As with the rear hatch I spray painted the flange black. Next step will be to glue the flange in place as well.
I gues I could have glued both the spacer and the flange in place at the same time, but I it is easier to hold things in place when glued seperately.
Tuesday, November 15, 2011
15-11-11: Stern Hatch
I just spent two hours building again...
I glued the stern hatch flange in place.
Hopefully this batch of epoxy will turn out better than the last one. For the first time ever the epoxy did not turn out right when I glued the spacer in place. I always try to leave a bit of epoxy in the mixing pot in order to have a mean of checking the state of curing. Last batch turned out brittle. I did not think the proportions of resin and hardener was so critical, but I can find no other explanation. I used a kitchen scale, but its not very accurate when measuring small amounts (<10 gr.)
Sunday, November 13, 2011
12-11-11: Cutting the holes for hatches
Today I cut the holes for the hatches. Its a scary feeling to start cutting into something you have spent a long time building.
First I made a template for the holes.
After that i traced the template onto the kayak.
I used my fantastic japanese saw to cut the holes. It takes a bit of patience, but I feel more in control than if I used a jigsaw....
Done ! Two holes cut in the deck....
I used my skilsaw to cut a piece of birch plywood for the hatch flanges.
Ooops... A good thing i had ajusted he saw not to cut too deep..... I only cut a minor goove in my sawhorse. :-(
The hatch cover will be laying on a flange and a gasket. To lower the flange and make space for the gasket I put a spacer between the flange and the deck.
The spacer is now glued in place with epoxy.
The flange is now almost ready to be glued to the spacer. I gave the spacer a quick paint of black.
Tomorrow (hopefully) I will glues the flange in place.
To hold the hatches I will use under deck bungee cord...
Monday, October 31, 2011
30-10-11: Reinforsing the cockpit rim
Finally I got to work on the kayak again.
I have reinforced the cockpit rim with fiberglass.
It was not as difficult as I had feared.
When the epoxy has vured I will trim of the edges.
Sunday, October 2, 2011
02-10-11: The skeg III and more
Aaaaaaaagh f@#!$@%&#%^~!@$@^&..
When turning over the hull I realized that the skeg box appears to be placed crooked. The problem is that I only have looked at the inside of the hull when lining up the skeg box.
I was so turned down by this that I left the kayak for a few days thinking about what to do next...
I could remove the skeg box and make a new slit the size of the outside of the skeg box instead of the inside, but I doubt that I can remove the box without ruining it.
I have now looked at the crooked slit a thousand times.... I had almost decided to grind down the skeg box and make a new when a realized that the slit is not as crooked as it might appear at first glance.
When squeezing a straight piece of wood into the slit I can see that the slit is not that crooked. In fact it is as straight as I could possibly make it.
The thing is that the skeg box is just a bit crooked to the left (when looking from the stern) and the dark hardwood list a bit crooked to the right. This gives the impression that is is more crooked than it actually is.
This settles the matter. I will keep the skeg box as it is, but sand it a bit to make it look more in line. Next pic shows the result.
The skeg placed in the box .
The first time ever in my kayak. And the feeling is just awesome.
When turning over the hull I realized that the skeg box appears to be placed crooked. The problem is that I only have looked at the inside of the hull when lining up the skeg box.
I was so turned down by this that I left the kayak for a few days thinking about what to do next...
I could remove the skeg box and make a new slit the size of the outside of the skeg box instead of the inside, but I doubt that I can remove the box without ruining it.
I have now looked at the crooked slit a thousand times.... I had almost decided to grind down the skeg box and make a new when a realized that the slit is not as crooked as it might appear at first glance.
When squeezing a straight piece of wood into the slit I can see that the slit is not that crooked. In fact it is as straight as I could possibly make it.
The thing is that the skeg box is just a bit crooked to the left (when looking from the stern) and the dark hardwood list a bit crooked to the right. This gives the impression that is is more crooked than it actually is.
The skeg placed in the box .
The first time ever in my kayak. And the feeling is just awesome.
Subscribe to:
Comments (Atom)


