Saturday, July 9, 2011

09-07-11: Cockpit rim

The deck is now done and I am very satisfied with the look of it... On the rear deck some of the strips was placed a bit lover than the others. After trying to sand it by hand for half an hour I changed to the belt sander..  Its very scary to place the belt sander on the deck and start it... It takes a delicate touch...

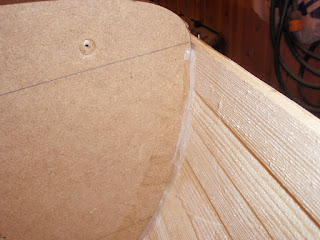
I cut out a dublicate of hte cockpit  template. I will use this when building the cockpit rim.

The two templates are placed a bit apart with seperators between them.


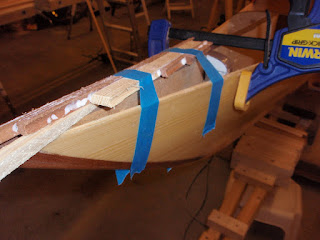
To hold the shape of hte rim when the templates are removed I glued some strips on top of the cockpit rim.


Thursday, July 7, 2011

07-07-11: Last strips on the deck

Now its time for the very last strip on the deck. As you can see I  had to surrender an put in a screw to hold it all in place.


Posted by Picasa

Wednesday, July 6, 2011

05-07-11: Building the deck II

I am now building from the centerstrips and outward on the front deck.


On the rear deck I build from the sheerline and inward all the way.

Posted by Picasa

Monday, July 4, 2011

03-07-11: Building the deck

When building the deck I had to cut some new narrow strips. All the strips I had cut earlier was about 25mm wide and much to wide to shape the deck curves. I cut a few boards of pine to 12mm wide strips.


Posted by Picasa

Monday, June 27, 2011

26-06-11: Center strips on deck

Finally I have overcome the obstacles of the deck tips.. I have decided to make more of the decorations on the deck. So I have started by placing strips of hardwood and pine in the centerline on both the front and back end of the kayak.


Center strips seen from the stern...

I have placed a paper template where the cockpit is located.

Posted by Picasa

Wednesday, June 15, 2011

14-06-11: Starting the deck II

Building the second half og the bow tip.


Here I am holding the first half of the tip in place..
Gluing it all together and hoping for the best....

Posted by Picasa

Tuesday, June 14, 2011

13-06-11: Starting the deck I

Allmost a month has past... I have been circling around the kayak and I have not been able to figure out how to get started. The problem was that I could not picture in my head how all the strips would meet in a very pointy tip. After a lot of reluctance and spying on other builders pictures I decided to build the two tips seperately from the rest of the deck.
Another problem was that the stations started to come loose. The only thing holding the stations in place was a bit of white wood glue sticking to the plastic tape I had used to cover the station edges. To hold the stations while building the deck I used hot melt glue....

I build the tips of narrow strips of both hardwood and pine. The tips were build i two halves and then sanded and glued together. I am sure there must be an easier way....


Posted by Picasa

Monday, May 16, 2011

15-05-11: Removing the strongback

Year ! I have now lifted the hull of the strongback. To hold the kayak I have build two cradles. The support is made of a piece of firehose supplied by my friend Niels Jørn.


All the supports from the strongback removed.


Tuesday, May 10, 2011

10-05-11 Fiberglassing the hull

The hull is now ready for fiberglassing. It's very exiting and a bit nerve wrecking. I have never before worked with fiberglass and epoxy...
The fiberglass is layed out and secured with a few clothes pegs.


Almost done.. I am distributing the epoxy with a plastic scraper.


Done! It was actually easier than I had thougth.

Posted by Picasa

Saturday, May 7, 2011

07-05-11: Priming with epoxy

Priming with 1. coat of epoxy. It is a bit of a tease. Its like the roller pulls out wood dust from some of the small gaps between some of the strips.


The Bow.

The stern.


Tuesday, May 3, 2011

03-05-11: New nice plane

I got my new planer today. Its a Stanley 9½ with a footprint of 40 x 160 mm. Super nice planer. I am looking forward to build the deck so I can use my new planer.

Monday, May 2, 2011

01-05-11: Sanding the hull

After having worked hard with sandpaper and sanding block I have realized that progress is to slow. It takes more radical means. So I have changed to the orbital sander with a grit 40 paper. That makes a change. Its a big advantage with the vacuumcleaner connected to the sander.