Monday, August 29, 2011

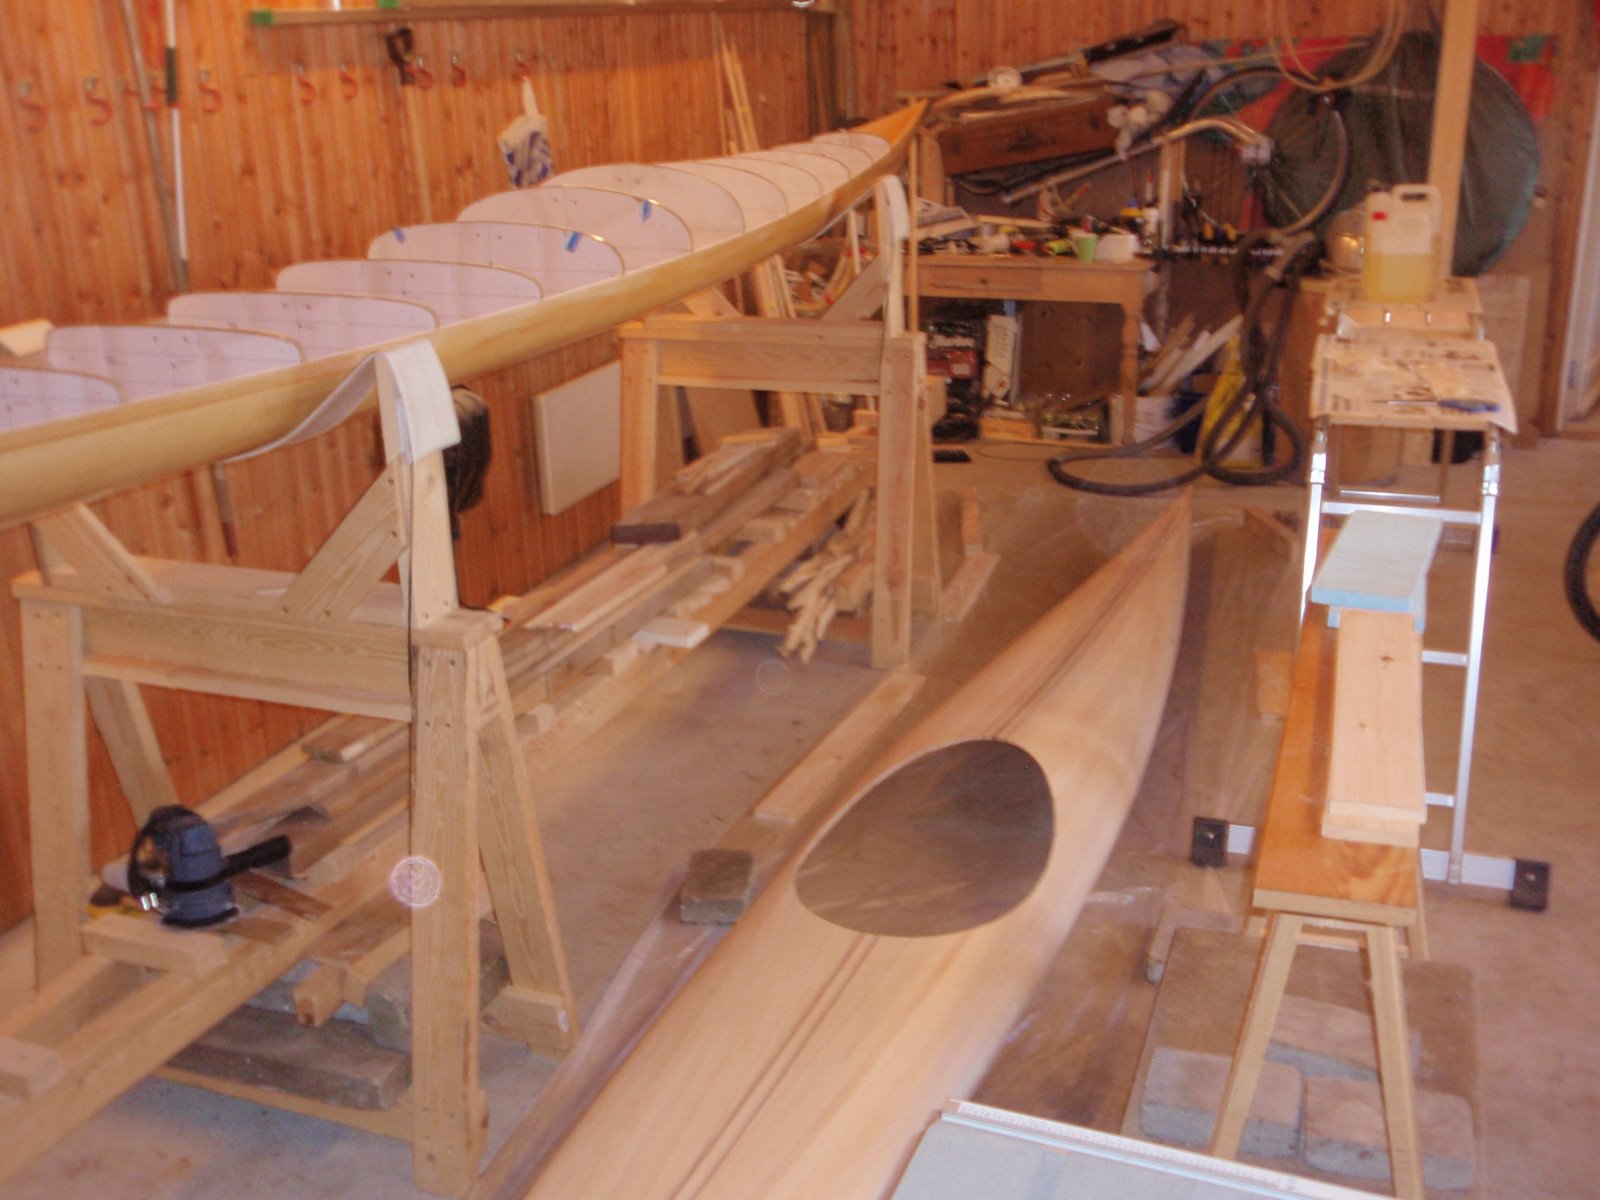
28-08-11: Stations removed

I have removed the stations and are removing all the small pieces of hot melt glue still sticking to the hull.


I have trimmed the edge off the glass fiber on the deck and placed the deck and hull together. It still fits fine. I tried to weigh the boat as it is now (still needing 2 layers of epoxy on the deck outside and glass fiber on the inside of both the deck and hull). At this stage the boat weigh 16.2 kg. I have no clue on how much the finished boat will weigh ?


Posted by Picasa

Sunday, August 28, 2011

27-08-11: Fiberglassing the deck / The skeg..

Today I pulled myself together and prepared to fiberglass the deck. I have been doing all kind of other things but getting to it. Today I got to it...


Done - and its looking good.. I used only about 300 gr. of epoxy for the deck.


I have figured out how to save my skeg from the garbage bin. I have glued two pieces of 4 mm birch plywood on the sides of the skeg. In this way the upper part of the skeg has enough thickness to accommodate the knots of the string and the elastic string.
This skeg is designed to be reparable from the outside. E.i. I can replace the elastic string an the string from the outside.
The elastic dstring pulls the skeg down and the string pulls the skeg up.
I still need to fit some plastic tubing for the string.

Tuesday, August 16, 2011

15-08-11: Sanding the epoxyed deck

I am now  sanding the deck and smoothing the terrible epoxy job I did earlier. Its very messy and noisy, but also satisfying to transform the deck from rough to smooth.


Monday, August 8, 2011

08-08-11: Fiberglassing the skeg

I have fiberglassed the skeg and placed it compressed between two pieces of foam. I worked out fine.
At this point I realize that the thickness of the skeg is too small to accommodate the  string for pulling up the skeg and the elastic ass well. The skeg is only about 4 mm thick and there is no room for the knots.
Back to the thinking box.....


Posted by Picasa

Sunday, August 7, 2011

07-08-11: Priming the deck with epoxy

Ready for priming the deck with epoxy. 
Done, - but not without a struggle... The roller I used was the same roller I used for the last layer of epoxy on the hull. When done with the hull I had placed the roller in acetone. When rolling epoxy on the deck the roller started to come apart and leaving pieces of "wool" in the epoxy. Fortunately I had a new roller ready but that left almost as much "wool" in the epoxy. What a mess! Its a good thing that its only a prining and I can sand it all down....


Posted by Picasa

Friday, August 5, 2011

04-08-11: Cockpit coaming

Back from our summer vacation in Italy and still have some days left. before starting at work. :-)
For the coaming I wanted to use some of my leftouver strips of hardwood. After steaming the strips for a period I shaped the strips over the cockpit template. After 3 breaking 3 strips I realize that the hardwood was not a good choice. 
To test I then steamed some pine strips to check out if these could stand the treatment..

My setup for steaming strips:


Posted by Picasa

Tuesday, July 19, 2011

18-07-11: Filling the deck / The Skeg

After the first sanding I went over the deck with epoxy and sawdust and filled out every small hole and crack.
I have started on the retractable skeg. First I glued togeteher som leftover strips and then I cut out the shape and sanded it.

Posted by Picasa

Saturday, July 9, 2011

09-07-11: Cockpit rim

The deck is now done and I am very satisfied with the look of it... On the rear deck some of the strips was placed a bit lover than the others. After trying to sand it by hand for half an hour I changed to the belt sander..  Its very scary to place the belt sander on the deck and start it... It takes a delicate touch...

I cut out a dublicate of hte cockpit  template. I will use this when building the cockpit rim.

The two templates are placed a bit apart with seperators between them.


To hold the shape of hte rim when the templates are removed I glued some strips on top of the cockpit rim.


Thursday, July 7, 2011

07-07-11: Last strips on the deck

Now its time for the very last strip on the deck. As you can see I  had to surrender an put in a screw to hold it all in place.


Posted by Picasa

Wednesday, July 6, 2011

05-07-11: Building the deck II

I am now building from the centerstrips and outward on the front deck.


On the rear deck I build from the sheerline and inward all the way.

Posted by Picasa

Monday, July 4, 2011

03-07-11: Building the deck

When building the deck I had to cut some new narrow strips. All the strips I had cut earlier was about 25mm wide and much to wide to shape the deck curves. I cut a few boards of pine to 12mm wide strips.


Posted by Picasa

Monday, June 27, 2011

26-06-11: Center strips on deck

Finally I have overcome the obstacles of the deck tips.. I have decided to make more of the decorations on the deck. So I have started by placing strips of hardwood and pine in the centerline on both the front and back end of the kayak.


Center strips seen from the stern...

I have placed a paper template where the cockpit is located.

Posted by Picasa

Wednesday, June 15, 2011

14-06-11: Starting the deck II

Building the second half og the bow tip.


Here I am holding the first half of the tip in place..
Gluing it all together and hoping for the best....

Posted by Picasa